Pesquisar na Comunidade
Mostrando resultados para as tags ''open tibia''.
Encontrado 45 registros
-
 ÁGUA TRANSPARENTE NO TIBIA Amostra/teste: Download Tibia.otfi -> Arquivo necessário para ativar transparência no seu client. (coloque junto ao tibia.dat e tibia.spr) Tibia.otfi Para ativar a transparência nas versões 8.54 e 8.60 é necessário o uso de dll: https://github.com/SaiyansKing/Tibia-Extended-Client-Library Download Object Builder -> Programa usado para add sprites https://github.com/ottools/ObjectBuilder/releases/tag/v0.4.8 Download Item Editor -> Usado para cadastrar as propriedades de itens novos e abrir no map editor. https://github.com/ottools/ItemEditor/releases/tag/v0.5.1 Download Sprites Contém: - Sprites de piso d'água full ground + 1 estilo borda (recomendo usar todos como borda, tirar full ground) - Sprites borda água-barranco. - Sprites borda água-areia. - Sprites borda areia-barranco-água. - Sprites borda água solo. - Sprites cachoeira + quedas d'água versão leste/norte - Sprites água transparente versão córrego (12x) sprites transparentes.rar (Senha para abrir o arquivo: tibiaking) -
-
 Welcome to ShadeCores We are excited to finally present to you: ShadeCores! After a long time of development and testing, we're finally ready to launch this awesome game! Quick Info for laziness: Rates: Tibia 7.4 theme 1x Experience 1x Skills 1x Magic 1x Loot 1x Regen General info: Official launch: April 24, 17:00 CEST. Create characters: 1 hour before launch (16:00 CEST). Website: https://shadecores.com/?subtopic=news Authentic Damages Monster attacks Monsters carrying equipment & loot Monster Spawns & respawn depending on players online World light and watches Traps Line of sight system Floor saving system Exhaustion system Much more.. General Cannot multi-client REAL Proven & Verified Anti-Cheat system = No cheaters Many quests modified to add mystery to the game for everyone Much more.. What is ShadeCores? ShadeCores is a game designed to mimic the oldschool version of Tibia.com, but in a slower pace. Our goal is to be a long lasting and functional game that doesn't run a course of being broken after a few years. Read more at: https://shadecores.com/?subtopic=about&view=about. World Map The map contains all places of Tibia 7.70. It also contains 100% spawns of Tibia 7.70. With exception of Ankrahmun and Port Hope that was removed for balancing purposes. Built authentically ShadeCores was built hand in hand with hacked Tibia files (7.70 version) and is very accurate to how Tibia was (with exception things that has been improved). If you played Tibia back in 7.4-7.70 and join ShadeCores, you will yourself notice how scary accurate every single spawn is. Read more at: https://shadecores.com/?subtopic=about&view=additional. Game health We have made many modifications to ensure a healthy economy and game. Read more at: https://shadecores.com/?subtopic=about&view=balance. Creature Behavior In ShadeCores, same as in CipSoft's, creatures that's fleeing for their life (low health) will not make any pauses no matter how close the player is. Creatures also doesn't have any exhaustion of their abilities such as attacks, healings and more. Read more at: https://shadecores.com/?subtopic=support&view=faq&topic=5-Features+-Creature+Behavior. Creature spawns ShadeCores has the very same spawn system that CipSoft's had back in the day. All creatures that spawns has a "home". And this "home" has a set amount of creatures that belongs to it, always same type of creature. Read more at: https://shadecores.com/?subtopic=support&view=faq&topic=3-Features+-Creature+spawns. Accurate creature loot & inventory ShadeCores have an accurate loot & inventory system for creatures, working identically as it did in CipSoft's back in the day. Which means that creatures with items that give light, will also light up the creature, or armors that will increase the armor of the creature, or that when a creature wear boots of haste, it will run noticeably faster! Read more at: https://shadecores.com/?subtopic=support&view=faq&topic=1-Features+-Creatures+equipping+their+loot+%26amp%3B+loot+system. Authentic exhaustions Believe it or not, OT's have it completely wrong, OTs uses 1 or 2 kind of exhaustions depending on which version they're meant to reflect (healing + attacking spells). However, in CipSoft's, there were 3 different exhaustions in the old days, 4 if you include "using item on.." exhaustion which was 1 second. Read more at: https://shadecores.com/?subtopic=support&view=faq&topic=6-Features+-Exhaustion+system. Floor saving ShadeCores are running with a map-saving system that allow the map to save certain edits done by players. The edits can almost be anything from items added to certain places, to open doors, wall torches that's lit or not, items hiding in boxes, book cases or even unexpected containers invisible to the naked eye. Read more at: https://shadecores.com/?subtopic=support&view=faq&topic=12-Features+-Floor+saving+system. Game health balance To ensure that ShadeCores become as perfect as possible, a lot has to be considered and corrected. Our goal is to make a long lasting and functional game that doesn't run a course of being broken after a few years. In ShadeCores, you're not meant to get unlimited supplies, hunting dragons, dragon lords, demons or other demonic critters, we don't fancy the rushed pace much of Tibia has become along with the community. Read more at: https://shadecores.com/?subtopic=support&view=faq&topic=13-Features+-Game+Health+Balance+(creatures%2C+supplies%2C+gold). Keep valuables valuable In ShadeCores it's harder to obtain "good" equipment, which will turn lower level equipment into the new good equipment. Read more at: https://shadecores.com/?subtopic=support&view=faq&topic=14-Features+-Game+Health+Balance+(equipment). Line of sight system In ShadeCores we use the same line-of-sight system as in CipSoft's. You may notice when you're playing that sometimes you can throw things in a way you can't do in most OT's. And you' may also notice that sometimes, you cannot throw things in same way as in most OT's. Read more at: https://shadecores.com/?subtopic=support&view=faq&topic=8-Features+-Line+of+sight+system. Poison storm Almost every OT either has ticking poison damage from around 50 counting down until 0, while others have an instant damage followed by poison or some other mixtures. While in reality, damage of the poison storm is decided by level and magic level, from the first tick of damage, it decreases with a few % until it reaches 0. Read more at: https://shadecores.com/?subtopic=support&view=faq&topic=7-Features+-Poison+storm. Traps functionality Traps does a static amount of damage. 30 to be exact, it's always 30. However, traps cause a physical damage that listen to the creatures armor. It means that the damage can and will be reduced by any armor the creature may have. Read more at: https://shadecores.com/?subtopic=support&view=faq&topic=2-Features+-Traps+(item). World light & watches In ShadeCores, time and world light works exactly like it did in CipSoft's back in the day. Read more at: https://shadecores.com/?subtopic=support&view=faq&topic=9-Features+-World+lights+%26amp%3B+watches. Anti-Cheat system We have a very advanced and automatic anti-cheat system that detects all kind of cheats rather quickly, be it bot, macro, tasker or others. This system was first developed and proven to work very well in RetroCores world "Cleanera". It has since then been improved to be faster and detect a wider array of cheats that people could use. A lot of servers has basically lied about that they're anti-bot, most of players have been in "anti-bot" servers that's been exploding with cheats and nobody gets punished, which is why most with good reason wont trust whenever someone says they're "antibot". But through Cleanera@RetroCores, we've verified for a lot of people that we're not bullshitting you, we're legit, we have a system that works and a lot of people have tested it and found themselves shocked when their "secret cheat" got caught even though nobody was nearby them. Additionally to the anti-cheat, ShadeCores does not allow multi-clienting Multi-Clienting will be treated as a cheat and lead to a deletion. To make sure nobody accidentally use multi-client without knowing the rules, we've made so that it's not possible to start more than one instance of the client. If you try to start a new client while already having one open, you will face this little message. Other Game Features Ability to play for free. No level restrictions on items nor spells. Non-stackable runes/fluids. No Runes from NPCs. No item-hotkeys. No wands/rods. No protection zone on boats/carpets. Manual aiming Anti-lag system. Great and improved monster systems. Monsters can be lured anywhere. No stairjump exhaust. Possibility to make UH traps. Accurate 7.4 formulas. Classic premium system. Classic promotion system. Many and random raids with possibility to loot raid-rare items. If you're new to the community, you're welcome to join the ShadeCores Discord server to chat with other players and staff! plain link: https://discord.gg/BtZmNDNUz6 ShadeCores will officially launch on April 24 at 17:00 CEST! You will be able to create characters starting at 16:00 CEST the same day! Sincerely, ShadeCores Staff
-
 SCREENSHOT http://3.1m.yt/Zwo99Sdx.png http://4.1m.yt/oG_cwli8u.png ______________________________________________ COMANDOS !autoloot add, itemId ou name -- Adicionando um item na lista !autoloot remove, itemId or name -- Remover um item da lista !autoloot show -- Mostrar a lista do autoLoot !autoloot clear -- Limpar a lista do autoLoot ______________________________________________ SCRIPT data/global.lua -- AutoLoot config AUTO_LOOT_MAX_ITEMS = 5 -- Reserved storage AUTOLOOT_STORAGE_START = 10000 AUTOLOOT_STORAGE_END = AUTOLOOT_STORAGE_START + AUTO_LOOT_MAX_ITEMS -- AutoLoot config end talkactions/talkactions.xml <talkaction words="!autoloot" separator=" " script="autoloot.lua"/> talkactions/scripts/autoloot.lua function onSay(player, words, param) local split = param:split(",") local action = split[1] if action == "add" then local item = split[2]:gsub("%s+", "", 1) local itemType = ItemType(item) if itemType:getId() == 0 then itemType = ItemType(tonumber(item)) if itemType:getId() == 0 then player:sendTextMessage(MESSAGE_STATUS_CONSOLE_BLUE, "There is no item with that id or name.") return false end end local itemName = tonumber(split[2]) and itemType:getName() or item local size = 0 for i = AUTOLOOT_STORAGE_START, AUTOLOOT_STORAGE_END do local storage = player:getStorageValue(i) if size == AUTO_LOOT_MAX_ITEMS then player:sendTextMessage(MESSAGE_STATUS_CONSOLE_BLUE, "The list is full, please remove from the list to make some room.") break end if storage == itemType:getId() then player:sendTextMessage(MESSAGE_STATUS_CONSOLE_BLUE, itemName .." is already in the list.") break end if storage <= 0 then player:setStorageValue(i, itemType:getId()) player:sendTextMessage(MESSAGE_STATUS_CONSOLE_BLUE, itemName .." has been added to the list.") break end size = size + 1 end elseif action == "remove" then local item = split[2]:gsub("%s+", "", 1) local itemType = ItemType(item) if itemType:getId() == 0 then itemType = ItemType(tonumber(item)) if itemType:getId() == 0 then player:sendTextMessage(MESSAGE_STATUS_CONSOLE_BLUE, "There is no item with that id or name.") return false end end local itemName = tonumber(split[2]) and itemType:getName() or item for i = AUTOLOOT_STORAGE_START, AUTOLOOT_STORAGE_END do if player:getStorageValue(i) == itemType:getId() then player:sendTextMessage(MESSAGE_STATUS_CONSOLE_BLUE, itemName .." has been removed from the list.") player:setStorageValue(i, 0) return false end end player:sendTextMessage(MESSAGE_STATUS_CONSOLE_BLUE, itemName .." was not founded in the list.") elseif action == "show" then local text = "-- Auto Loot List --\n" local count = 1 for i = AUTOLOOT_STORAGE_START, AUTOLOOT_STORAGE_END do local storage = player:getStorageValue(i) if storage > 0 then text = string.format("%s%d. %s\n", text, count, ItemType(storage):getName()) count = count + 1 end end if text == "" then text = "Empty" end player:showTextDialog(1950, text, false) elseif action == "clear" then for i = AUTOLOOT_STORAGE_START, AUTOLOOT_STORAGE_END do player:setStorageValue(i, 0) end player:sendTextMessage(MESSAGE_STATUS_CONSOLE_BLUE, "The autoloot list has been cleared.") else player:sendTextMessage(MESSAGE_STATUS_CONSOLE_BLUE, "Use the commands: !autoloot {add, remove, show, clear}") end return false end creaturescripts/creaturescripts.xml <event type="kill" name="AutoLoot" script="autoloot.lua" /> creaturescripts/scripts/autoloot.lua local function scanContainer(cid, position) local player = Player(cid) if not player then return end local corpse = Tile(position):getTopDownItem() if not corpse then return end if corpse:getType():isCorpse() and corpse:getAttribute(ITEM_ATTRIBUTE_CORPSEOWNER) == cid then for i = corpse:getSize() - 1, 0, -1 do local containerItem = corpse:getItem(i) if containerItem then for i = AUTOLOOT_STORAGE_START, AUTOLOOT_STORAGE_END do if player:getStorageValue(i) == containerItem:getId() then containerItem:moveTo(player) end end end end end end function onKill(player, target) if not target:isMonster() then return true end addEvent(scanContainer, 100, player:getId(), target:getPosition()) return true end creaturescripts/scripts/login.lua player:registerEvent("AutoLoot") ______________________________________________ CRÉDITOS Printer
 -
 Créditos: AnneMotta & Vodkart Descrição: Ao andar com o full addon de algumas outfits irá sair um efeito. Em creaturescript/script crie um arquivo.lua e renomeie para: outfiteffect.lua function onLogin(cid) registerCreatureEvent(cid, "EffectOutLogin") registerCreatureEvent(cid, "OutfitEffects") return doCreatureChangeOutfit(cid,{lookType = getCreatureOutfit(cid).lookType, lookHead = getCreatureOutfit(cid).lookHead, lookBody = getCreatureOutfit(cid).lookBody, lookLegs = getCreatureOutfit(cid).lookLegs, lookFeet = getCreatureOutfit(cid).lookFeet, lookAddons = getCreatureOutfit(cid).lookAddons}) end local events = {} function onOutfit(cid, old, current) local effect = { [136] = 3, [128] = 3, -- citizen [270] = 27,[273] = 27, -- jester [156] = 61,[152] = 61, -- assassin [147] = 44,[143] = 44, -- barbarian [148] = 45,[144] = 45, -- druid [157] = 68,[153] = 68, -- beggar [149] = 36,[145] = 36, -- wizard [279] = 17,[278] = 17, -- brotherwood [137] = 39,[129] = 39, -- hunter [141] = 66,[133] = 66, -- summoner [142] = 34,[134] = 34, -- warrior [155] = 31,[151] = 31, -- pirate [158] = 46,[154] = 46, -- shaman [288] = 6,[289] = 6 -- demonhunter } local o,c= effect[old.lookType],effect[current.lookType] if getPlayerAccess(cid) > 2 then return true elseif (not o or not c or old.lookAddons == 3 and o) then stopEvent(events[getPlayerGUID(cid)]) end if current.lookAddons == 3 and c then function WalkEffect(cid, c, pos) if not isCreature(cid) then return LUA_ERROR end if c then frompos = getThingPos(cid) if frompos.x ~= pos.x or frompos.y ~= pos.y or frompos.z ~= pos.z then doSendMagicEffect(frompos, c) end events[getPlayerGUID(cid)] = addEvent(WalkEffect, 100, cid, c, frompos) end return true end WalkEffect(cid, c, {x=0, y=0, z=0}) end return true end em creaturescript.xml adicione as tags: <event type="login" name="EffectOutLogin" event="script" value="outfiteffect.lua"/> <event type="outfit" name="OutfitEffects" event="script" value="outfiteffect.lua"/> Como configurar: [iD DA OUTFIT] = N° DO EFEITO
 -
 Olá KingTibianos A pedido de um membro, vou postar um tutorial de como criar um NPC. Explicando detalhadamente. Primeiramente, cada npc se encontra em data/npcs no seu ot. Vou postar aqui como exemplo um NPC que venda algumas coisas: <?xml version="1.0" encoding="UTF-8"?> <npc name="Paul" script="default.lua" walkinterval="2000" floorchange="0"> <health now="100" max="100"/> <look type="129" head="57" body="86" legs="0" feet="114" addons="2"/> <parameters> <parameter key="module_shop" value="1"/> <parameter key="shop_sellable" value="crossbow,2455,150;bow,2456,130"/> <parameter key="shop_buyable" value="crossbow,2455,360;bow,2456,200;spear,2389,10;royal spear,7378,25;assassin star,7368,200;power bolt,2547,30;bolt,2543,3;arrow,2544,2;"/> </parameters> </npc> Explicando: <?xml version="1.0" encoding="UTF-8"?> Especifica o tipo de linguagem usada no script. Não altere. npc name = Nome do NPC script = Endereço do Script. Default é o padrão. walkinterval = O intervalo de tempo em que o NPC anda. floorchange = Se ele "troca de chão", ou seja se ele se movimenta. healthnow = Tanto de vida que o Npc está no momento. Geralmente modificado em caso de "quests" específicas. max = O tanto de vida máximo dele. Este deve ser maior que o healthnow. looktype = Roupa usada, você pode ver as roupas no arquivo: data/XML/outfits.xml head, body, legs, feet = A cor da roupa, eu não tenho agora, mas vou provicenciar o pack das cores. addon = Se usa algum addon. 1 para o 1°, 2 para o 2°, 3 para os dois. <parameters> = Define que abaixo começará uma série de códigos parâmetros. module_shop = Módulo, usado. No caso aqui, é shop.. compras/vendas. shop_sellable = Define o que o NPC lhe oferece para vender. value = Determina as Id's, Nomes e Preços. crossbow,2455,150; = Primeiro "crossbow" nome que aparecerá na janela de "venda" do NPC, ID do item, Preço do Item; shop_buyable = Define o que o NPC irá lhe oferece para comprar Como colocar no RME Map Editor (Atual usado): 1° Abra o RME, juntamente ao seu mapa. 2° Clique em File>Import>Importar Monsters/NPC 3° Clique no arquivo XML acima criado 4° De um F5 para garantir o aparecimento do NPC 5° Vá em Window e selecione Terrain Palette caso ainda não tenha feito isso. 6° Vá em Creature, no canto esquero onde tem um option Terrain Palette. 7° Selecione abaixo em creatures, NPCS. 8° Clique lá embaixo, em spawns e crie uma área de circulamento do NPC no seu Mapa. 9° Clique no nome do seu NPC, e coloque-o no mapa. 10° Salve o Mapa! Pronto!! Pronto, seu NPC criado, e desenvolvido. Em breve o tutorial de Mapping, criando uma área para seu NPC! Bem detalhado! Caso tenha gostado, +REP Ou ao menos comente sobre o Post! Abraços!
 -
 Olá galerinha do TK, hoje venho trazer aqui para vocês um dos melhores e mais famoso evento da atualidade, é o famoso: War of Emperium (WOE), estou disponibilizando ele aqui de graça para vocês, bom aproveito! #Descrição: Este evento consiste em dominar o castelo através da destruição de alguns geradores. #O que possui? - Totalmente automatizado (Script: Abertura, Entrega do prêmio, Designação do vencedor e Encerramento). - Página interativa (PHP: Possui explicação do evento e os 5 últimos vencedores do castle). - Talkactions (Script: Comandos que informam quanto tempo falta para fechar e puxam membros para dentro do castelo). - Tutorial (Arquivo: Explicando passo a passo a instalação). - Castelo com 4 andares (Mapa). - Entre outras coisas…. *OBS: Este evento só funciona em TFS 0.4. DOWNLOAD: CLICK AQUI Download Direto: war_of_emperium__completo.zip Scan: https://www.virustotal.com/gui/file/c7883cad9208371272d3609c007c2e53a669f86b64e556f90e625b10b7c6f91e/detection Créditos: ChaitoSoft Jhon Thiagobji
 -
 Minimapa Download na descrição do Video Scan na descrição do Video Video mapeando e apresentando a hunt. Quem quiser acompanhar o canal vou postar bastante download de áreas de hunts, cidades e etc... atendo pedidos também. Da um likezão lá rapeize e se inscreve também me ajudem que vou postar bastante mapa pra vocês.


-
Pack disponibilizado por: Clique Aqui para entrar! Object Builder (Editor de dat e Sprites) para 10x. ObjectBuilder.rar Object Builder para 8.X (0.4.8) com Adobe AIR (13 MB). https://www.mediafire.com/file/dq994i3fia7fckk/ObjectBuilder_0_4_8.rar/file scan Tibia 12 SPR funciona com Object Builder 10.X (0.3.3) https://www.mediafire.com/file/fvuf28xh0zej859/Tibia_12_SPR.rar/file Assets Editor (12+ para pasta assets) https://github.com/Arch-Mina/Assets-Editor Como usar: Remere's Map Editor 3.7 + fixed brushes: https://github.com/hampusborgos/rme/releases RME_3.7_fixed_brushes.rar 10.98 com sprites 12.70, OTB: https://github.com/EPuncker/1098extended 10.98_12.70_sprites_OTB.rar 10.98 com sprites 12.70 TIBIA KING OTBR 10.98_12.70_sprites_OTBR.rar 12.70 mounts and outfits 12.70_mounts_and_outfits.rar Paleta com itens mágicos (v 12) Disponibilizado por: Zbizu (Zbizu#7420) trickery_zbizu.xml Este pack utiliza recursos do projeto oficial TFS (The Forgotten Server), projetos paralelos como OtservBR, Object Builder, outros, e demais colaboradores.
-
 Nome: Perfect Upgrade System Tipo: Biblioteca, Action, Sistema Autor: Oneshot Essa é a versão final do Perfect Refine System ou Perfect Upgrade System criado por mim. É um sistema construído em cima de funções em POO (orientação a objetos), o que o torna muito versátil, possibilitando a outros programadores/scripters criarem seus próprios sistemas com base na biblioteca. A função do sistema é simples. Não passa de um sistema de refino, presente em todos os servidores, onde você usa um item em um equipamento e este fica mais forte e ganha um nome caracterizando o nível de força - bem clichê - mas muito interessante. Meu sistema é um pouco diferente dos outros, pois possui algumas características exclusivas, listadas abaixo: O nível máximo configurável é praticamente ilimitado O sistema funciona com armas de combate corpo-a-corpo, bows e crossbows. O refino pode falhar, não acontecendo nada, regredindo o nível ou resetando ele. Há um sistema nativo de broadcasts, que são enviados quando um jogador consegue refinar um equipamento até um certo nível ou maior. As chances são configuradas manualmente e sua randomização é muito precisa. Há dois modos de instalar o sistema em seu servidor, o primeiro é baixar a pasta com os scripts necessários e apenas copiar as chaves nos arquivos XMLs ou então seguir o curto tutorial de instalação. Crie um arquivo chamado upgradesystem.lua na pasta data/lib e copie o conteúdo abaixo: --[[ PERFECT UPGRADE SYSTEM 2.0 Criado por Oneshot É proibido a venda ou a cópia sem os devidos créditos desse script. ]]-- UpgradeHandler = { levels = { [1] = {100, false, false}, [2] = {90, false, false}, [3] = {75, false, false}, [4] = {60, true, false}, [5] = {45, true, false}, [6] = {30, true, false}, [7] = {25, true, false}, [8] = {20, true, true}, [9] = {15, true, true}, [10] = {10, true, true}, [11] = {10, true, true}, [12] = {5, true, true} }, broadcast = 7, attributes = { ["attack"] = 2, ["defense"] = 1, ["armor"] = 1 }, message = { console = "Trying to refine %s to level +%s with %s%% success rate.", success = "You have upgraded %s to level +%s", fail = "You have failed in upgrade of %s to level +%s", downgrade = "The upgrade level of %s has downgraded to +%s", erase = "The upgrade level of %s has been erased.", maxlevel = "The targeted %s is already on max upgrade level.", notupgradeable = "This item is not upgradeable.", broadcast = "The player %s was successful in upgrading %s to level +%s.\nCongratulations!!", invalidtool = "This is not a valid upgrade tool.", toolrange = "This upgrade tool can only be used in items with level between +%s and +%s" }, tools = { [8306] = {range = {0, 10}, info = {chance = 0, removeable = true}}, }, isEquipment = function(self) local weaponType = self:getItemWeaponType() return ((weaponType > 0 and weaponType < 7) or self.item.armor ~= 0) end, setItemName = function(self, name) return doItemSetAttribute(self.item.uid, "name", name) end, chance = function(self) local chances = {} chances.upgrade = (self.levels[self.item.level + 1][1] or 100) chances.downgrade = (self.item.level * 5) chances.erase = (self.item.level * 3) return chances end } function UpgradeHandler:new(item) local obj, ret = {} obj.item = {} obj.item.level = 0 obj.item.uid = item.uid for key, value in pairs(getItemInfo(item.itemid)) do obj.item[key] = value end ret = setmetatable(obj, {__index = function(self, index) if _G[index] then return (setmetatable({callback = _G[index]}, {__call = function(self, ...) return self.callback(item.uid, ...) end})) else return UpgradeHandler[index] end end}) if ret:isEquipment() then ret:update() return ret end return false end function UpgradeHandler:update() self.item.level = (tonumber(self:getItemName():match("%+(%d+)")) or 0) end function UpgradeHandler:refine(uid, item) if not self.item then doPlayerSendTextMessage(uid, MESSAGE_STATUS_CONSOLE_BLUE, self.message.notupgradeable) return "miss" end local tool = self.tools[item.itemid] if(tool == nil) then doPlayerSendTextMessage(uid, MESSAGE_EVENT_DEFAULT, self.message.invalidtool) return "miss" end if(self.item.level > #self.levels) then doPlayerSendTextMessage(uid, MESSAGE_STATUS_CONSOLE_RED, self.message.maxlevel:format(self.item.name)) return "miss" end if(self.item.level < tool.range[1] or self.item.level >= tool.range[2]) then doPlayerSendTextMessage(uid, MESSAGE_STATUS_CONSOLE_RED, self.message.toolrange:format(unpack(tool.range))) return "miss" end local chance = (self:chance().upgrade + tool.info.chance) doPlayerSendTextMessage(uid, MESSAGE_STATUS_CONSOLE_BLUE, self.message.console:format(self.item.name, (self.item.level + 1), math.min(100, chance))) if(tool.info.removeable == true) then doRemoveItem(item.uid, 1) end if chance * 100 > math.random(1, 10000) then doPlayerSendTextMessage(uid, MESSAGE_STATUS_CONSOLE_ORANGE, self.message.success:format(self.item.name, (self.item.level + 1))) if (self.item.level + 1) >= self.broadcast then doBroadcastMessage(self.message.broadcast:format(getCreatureName(uid), self.item.name, (self.item.level + 1))) end self:setItemName((self.item.level > 0 and self:getItemName():gsub("%+(%d+)", "+".. (self.item.level + 1)) or (self:getItemName() .." +1"))) for key, value in pairs(self.attributes) do if getItemAttribute(self.item.uid, key) ~= nil or self.item[key] ~= 0 then doItemSetAttribute(self.item.uid, key, (self.item.level > 0 and getItemAttribute(self.item.uid, key) or self.item[key]) + value) end end return "success" else if(self.levels[self.item.level][3] == true and (self:chance().erase * 100) > math.random(1, 10000)) then doPlayerSendTextMessage(uid, MESSAGE_STATUS_CONSOLE_RED, self.message.erase:format(self.item.name)) self:setItemName(self.item.name) for key, value in pairs(self.attributes) do if self.item[key] > 0 then doItemSetAttribute(self.item.uid, key, self.item[key]) end end elseif(self.levels[self.item.level][2] == true and (self:chance().downgrade * 100) > math.random(1, 10000)) then doPlayerSendTextMessage(uid, MESSAGE_STATUS_CONSOLE_RED, self.message.downgrade:format(self.item.name, (self.item.level - 1))) self:setItemName((self.item.level == 1 and self.item.name or self:getItemName():gsub("%+(%d+)", "+".. (self.item.level - 1)))) for key, value in pairs(self.attributes) do if getItemAttribute(self.item.uid, key) ~= nil or self.item[key] ~= 0 then doItemSetAttribute(self.item.uid, key, (self.item[key] + value * (self.item.level - 1))) end end else doPlayerSendTextMessage(uid, MESSAGE_STATUS_CONSOLE_RED, self.message.fail:format(self.item.name, (self.item.level + 1))) end return "fail" end end Crie um arquivo chamado upgrade.lua em data/actions/scripts e cole o conteúdo abaixo: function onUse(cid, item, fromPosition, itemEx, toPosition) if isCreature(itemEx.uid) then return doPlayerSendDefaultCancel(cid, RETURNVALUE_NOTPOSSIBLE) end local obj = UpgradeHandler:new(itemEx) if(obj == false) then return doPlayerSendCancel(cid, UpgradeHandler.message.notupgradeable) end local status = obj:refine(cid, item) if status == "success" then --doSendAnimatedText(toPosition, "Success!", COLOR_GREEN) doSendMagicEffect(toPosition, CONST_ME_MAGIC_GREEN) elseif status == "fail" then --doSendAnimatedText(toPosition, "Fail!", COLOR_RED) doSendMagicEffect(toPosition, CONST_ME_POFF) else doSendMagicEffect(toPosition, CONST_ME_POFF) end return true end No arquivo actions.xml, cole a seguinte linha: <action itemid="8306" event="script" value="upgrade.lua"/> Para adicionar mais níveis de refino no sistema, edite a seguinte tabela: levels = { [1] = {100, false, false}, [2] = {90, false, false}, [3] = {75, false, false}, [4] = {60, true, false}, [5] = {45, true, false}, [6] = {30, true, false}, [7] = {25, true, false}, [8] = {20, true, true}, [9] = {15, true, true}, [10] = {10, true, true} }, Por padrão, ela já está configurado como na maioria dos MMORPGs, 10 níveis de refino, com chances de sucesso, regressão e "quebra". Mas se você quiser, por exemplo, adicionar mais dois níveis, siga o modelo, sempre colocando uma vírgula no final com exceção da última linha da tabela: levels = { [1] = {100, false, false}, [2] = {90, false, false}, [3] = {75, false, false}, [4] = {60, true, false}, [5] = {45, true, false}, [6] = {30, true, false}, [7] = {25, true, false}, [8] = {20, true, true}, [9] = {15, true, true}, [10] = {10, true, true}, [11] = {10, true, true}, [12] = {5, true, true} }, O primeiro valor é chance de sucesso, o segundo se o item pode regredir na tentativa e o terceiro é se o item para "quebrar" (perder todo o nível de refino). Para criar novas ferramentas (itens) de refinar, configure a tabela abaixo: tools = { [8306] = {range = {0, 10}, info = {chance = 0, removeable = true}}, }, Seguindo o mesmo esquema da tabela anterior, vírgulas em todas as linhas com exceção da última, seguindo o modelo abaixo. Por exemplo, uma ferramenta de ID 8303 que refine do level +6 ao +10, que dê 10% de chance bônus e que seja finita, eu faço assim: tools = { [8306] = {range = {0, 10}, info = {chance = 0, removeable = true}}, [8310] = {range = {6, 10}, info = {chance = 10, removeable = true}} }, Em breve vídeo de demonstração com sistema em funcionamento. Perfect Upgrade System.rar
 -
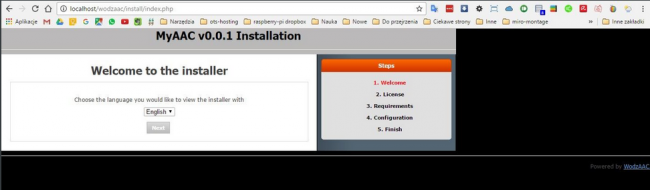
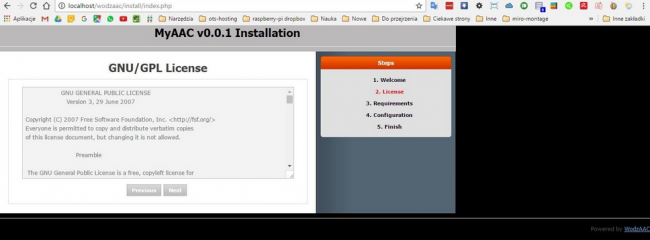
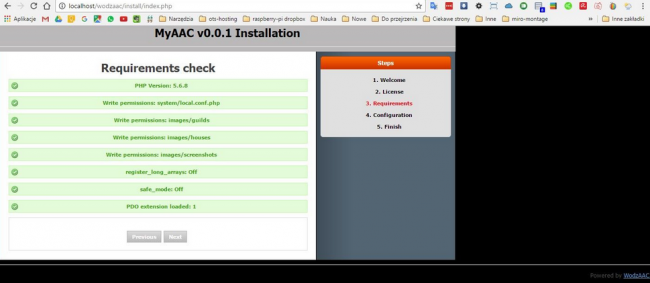
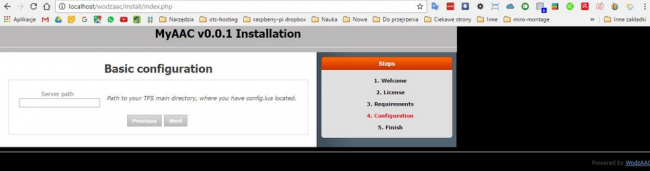
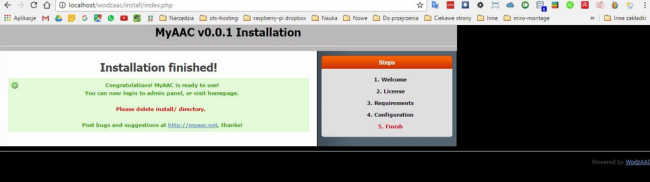
MyAAC é um Criador de Conta Automático (AAC) e Sistema de Gerenciamento de Conteúdo (CMS) gratuito e de código aberto escrito em PHP. É uma bifurcação do projeto Gesior. Ele suporta somente bancos de dados MySQL. GitHub: https://github.com/slawkens/myaac Site oficial: http://my-aac.org Requisitos: - PHP 5.3.0 ou superior; - Database MySQL; - Extensão PDO PHP; - Extensão XML PHP; - Extensão ZIP PHP; - (Opcional) Mod_rewrite para urls amigáveis. Características: Todas as características do Gesior AAC, listadas aqui (UNNAMED acc. maker 0.3.2 beta for TFS) Suporte para TFS 0.2, 0.3, 0.4, 1.x, otserv 0.6.3, 0.6.4 e superior. Com base no GesiorAAC, mas a maioria dos arquivos foi dramaticamente atualizada, com correções de bugs e alterações de código. Base muito limpa. Fácil instalação com auto-detecção para a maioria dos valores do config.lua Endereços agradáveis com urls amigáveis (regras do .htaccess)! Registro de ações da conta (mostra ações que você fez em sua conta, por exemplo, personagem criado, chave de recuperação comprada, etc.) (Criação de Conta - Bandeiras dos Países) 3 tipos de assinatura dos personagens para escolher Sistema reCAPTCHA do Google. Sistema de cache. A maioria das páginas é armazenada no cache para uma atualização mais rápida. Com poderoso sistema de plugins, você pode facilmente adicionar funcionalidade ao seu site. Adicione temas, adicione páginas, adicione qualquer coisa! Páginas personalizadas. Adicionar / Modificar novas páginas do painel de administração Editar jogadores do painel de administração. Fácil migração do Gesior AAC para MyAAC através do script de instalação. e mais! Não listado aqui. Imagens: Como instalar? Baixe os arquivos necessários, navegue em seu navegador para o local onde você carregou seus arquivos - normalmente http: // localhost. Siga as etapas de instalação para instalar o AAC. É possível migrar do GesiorAAC para o MyAAC? Sim! É possível, graças ao script de instalação, que automaticamente detecta o esquema de banco de dados existente e faz a atualização. Basta fazer o upload do MyAAC para a pasta raiz da web e seguir as etapas de instalação. Nenhuma etapa adicional precisa ser feita! Seu banco de dados será convertido de Gesior para MyAAC, e você não perderá nada! Tão simples! Demo: Com um site demo, é possível visualizá-lo com vários layouts. http://demo.my-aac.org Download: https://github.com/slawkens/myaac/archive/master.zip Créditos: Slawkens (Myaac) Majesty (tutorial e infos)
-
 Ae galera do TK, uns caras ficaram me mandando PM pedindo esse sistema aqui.. aparentemente tem em algum server e eles queriam replicar o sistema no OT deles. Não sei como funciona no outro server mas no script que eu fiz vai funcionar assim: Serão 100 livros que você poderá comprar de um npc específico, cada livro te dá 1 ponto a mais na skill Dodge e isso acarreta em 0.3% de chance a mais de desviar de um golpe e tomar só 50% de dano. Infelizmente eu nunca joguei no servidor que foi o pioneiro desse sistema (na vdd eu nem sei qual é) então eu não fiz igual o deles, na realidade o meu só funciona ao perder vida então se o mago usar utamo vita acabou os dodge's dele. Outra coisa importante é que o player tem uma chance rara de dar Dodge no Dodge, ou seja, levando 1/4 do dano. Só vai funcionar para ataques de criaturas, tanto melee quanto spells, ou seja, se o cara passar no fogo não tem chance dele desviar do dano Sem mais delongas, vamos ao script: Crie um arquivo chamado dodge.lua na pasta creaturescripts\scripts e coloque isso dentro dele: agora adicione essa linha no creaturescripts.xml: <event type="statschange" name="dodge" event="script" value="dodge.lua"/> em creaturescripts\scripts\login.lua adicione isso antes do ultimo return true: registerCreatureEvent(cid, "dodge") if getPlayerStorageValue(cid, 48902) == -1 then setPlayerStorageValue(cid, 48902, 0) end agora vá em actions.xml e adicione essa linha aqui: <action itemid="1950" script="dodgebook.lua"/> note que vc pode mudar o ID do livro a hora que vc quiser. em items.xml, procure o item com o ID que vc irá utilizar e deixe ele assim: <item id="1950" article="a" name="Skill Book [DODGE]"> <attribute key="weight" value="1300" /> </item> agora crie um arquivo chamado dodgebook em actions\scripts e coloque isso dentro dele: local config = { minlevel = 150, --- level que precisa pra comprar o livro price = 10000, --- preço do livro itemid = 1950 --- ID DO LIVRO } --- end config function getDodgeSkill(cid) dodgeskill = getPlayerStorageValue(cid, 48902) return dodgeskill end local keywordHandler = KeywordHandler:new() local npcHandler = NpcHandler:new(keywordHandler) NpcSystem.parseParameters(npcHandler) local talkState = {} -- OTServ event handling functions start function onCreatureAppear(cid) npcHandler:onCreatureAppear(cid) end function onCreatureDisappear(cid) npcHandler:onCreatureDisappear(cid) end function onCreatureSay(cid, type, msg) npcHandler:onCreatureSay(cid, type, msg) end function onThink() npcHandler:onThink() end -- OTServ event handling functions end function creatureSayCallback(cid, type, msg) -- Place all your code in here. Remember that hi, bye and all that stuff is already handled by the npcsystem, so you do not have to take care of that yourself. if (not npcHandler:isFocused(cid)) then return false end local talkUser = NPCHANDLER_CONVbehavior == CONVERSATION_DEFAULT and 0 or cid if msgcontains(msg, 'skill book') then if getDodgeSkill(cid) == dodgeskill then selfSay('You want to buy Skill Book [DODGE]? It will cost '..config.price..' gp\'s!', cid) talkState[talkUser] = 1 else selfSay('I couldnt acess your data bank!', cid) end elseif(msgcontains(msg, 'yes') and talkState[talkUser] == 1) then if getPlayerMoney(cid) < config.price then selfSay('Its necessary to have at least '..config.price..' gp\'s in order to buy the Skill Book!', cid) elseif getPlayerLevel(cid) < config.minlevel then selfSay('The minimum level for buying this skill book is '..config.minlevel..'!', cid) else doPlayerRemoveMoney(cid,config.price) doPlayerAddItem(cid, config.itemid, 1, TRUE) end talkState[talkUser] = 0 elseif(msgcontains(msg, 'no')) and isInArray({1}, talkState[talkUser]) == TRUE then talkState[talkUser] = 0 selfSay('Ok.', cid) elseif msgcontains(msg, 'level') then selfSay('You have Leveled your Dodge Skill to ['..getDodgeSkill(cid)..'/100].', cid) end return true end npcHandler:setCallback(CALLBACK_MESSAGE_DEFAULT, creatureSayCallback) npcHandler:addModule(FocusModule:new()) lembrando que no começo vc pode editar o preço, o level que precisa pra comprar a skill e o ID do livro que será usado (USE O MESMO ID NO ITEMS.XML E NO ACTIONS.) agora crie o npc dodgeseller.xml e coloque isso nele: <npc name="Dodge Skill Seller" script="data/npc/scripts/bookseller.lua" access="5" lookdir="1"> <health now="1000" max="1000"/> <look type="133" head="95" body="86" legs="86" feet="38" addons="3"/> <parameters> <parameter key="message_greet" value="Hello |PLAYERNAME|. I've been waiting for you to come.. Say 'skill book' or 'level'" /> <parameter key="message_farewell" value="Cya folk." /> <parameter key="message_walkaway" value="How Rude!" /> </parameters> </npc> Explanações gerais: O sistema é bem simples (muito simples mesmo), ele pega o valor do storage do cara e multiplica por 3.. se isso for maior que um numero aleatório criado entre 0 e 1000 ele dá dodge e solta os efeitinhos lá do creaturescripts. Note que no nivel máximo o cara vai ter 100 de storagevalue e isso será multiplicado por 3 resultando em 300. Se 300 for maior que um valor aleatorio entre 0 e 1000 (30% de chance) você vai tomar apenas metade do dano. Vc pode editar a vontade e melhorar ele da forma que quiser, se vc quiser que todos os danos do player sejam passíveis de serem esquivados mude aqui: if type == STATSCHANGE_HEALTHLOSS and isCreature(attacker) then apenas retirando esse and isCreature(attacker), daí até dano de firefield vai dar pra dar dodge. Se você quiser adicionar classes que poderão usar (só knights e paladins por exemplo) só colocar isInArray({3,4,7,8}, getPlayerVocation(cid)) como condição na action. E se vc quiser que mago possa dar dodge mesmo com utamo vita (OQUE NÃO FAZ MUITO SENTIDO JÁ QUE O ESCUDO DE MANA FICA EM VOLTA DO PLAYER TEORICAMENTE, MAS TUDO BEM) é só colocar if type == STATSCHANGE_HEALTHLOSS or type == STATSCHANGE_MANALOSS and isCreature(attacker) then Se você quiser que só ataques de Players sejam desviados ou só ataques de monstros é só trocar isCreature(attacker) por isMonster(attacker) ou isPlayer(attacker). Bom, isso é tudo, espero que vcs tenham curtido e qualquer coisa é só comentar ou me dar um Rep que ajuda pra caralho. Um abraço pra vocês. EDIT: Arrumei o problema de o npc não dar bye automáticamente qnd o player se afasta, bugando em algumas versões e impedindo de conversar com outros npcs. Apenas substituam o arquivo em scripts pela versão atualizada, grato.
 -
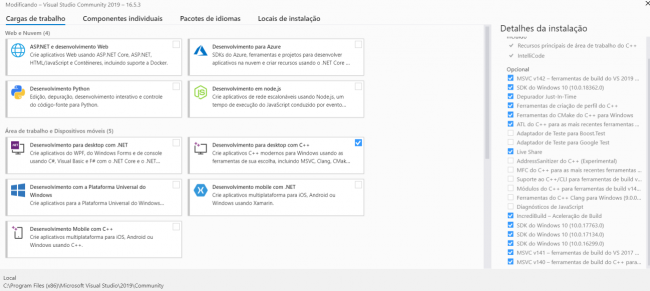
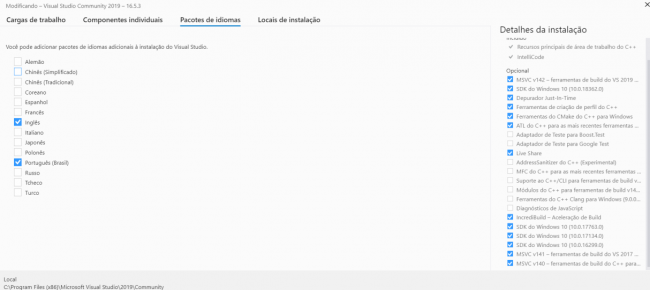
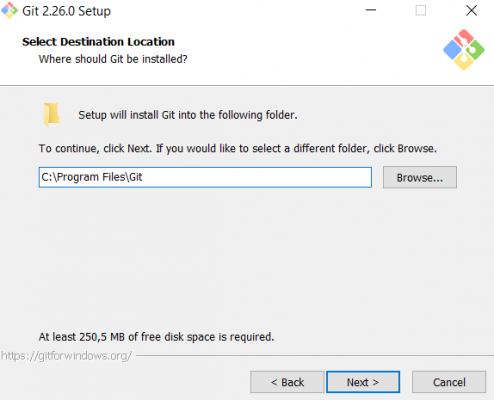
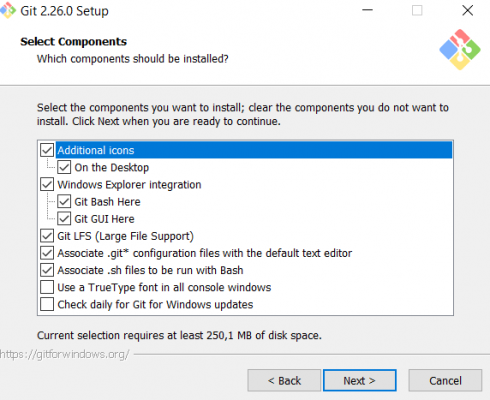
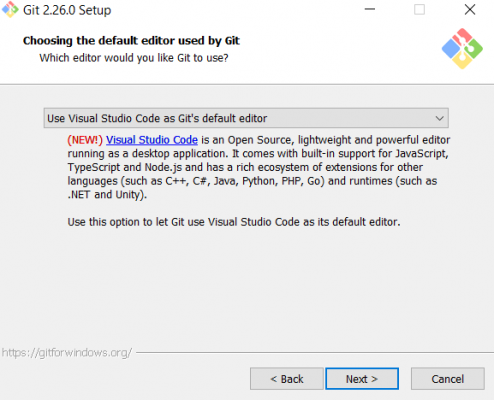
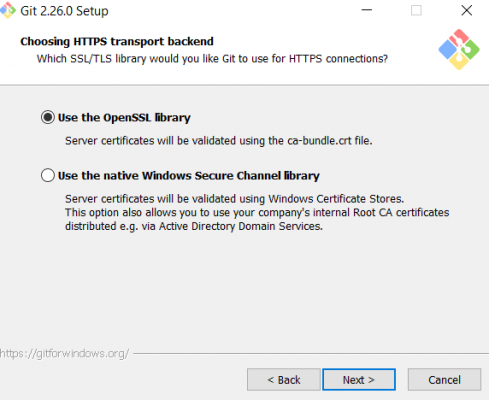
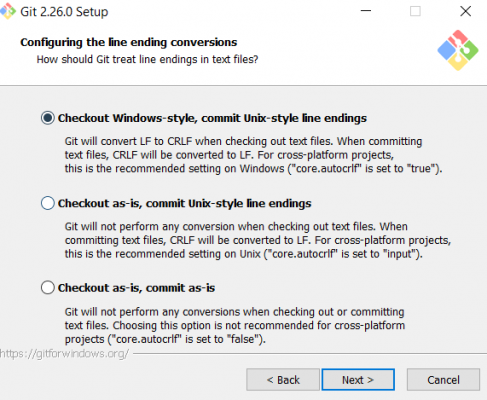
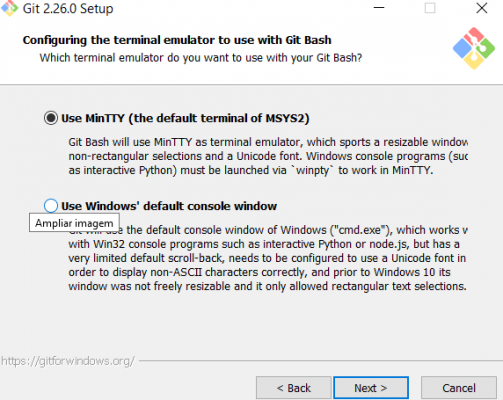
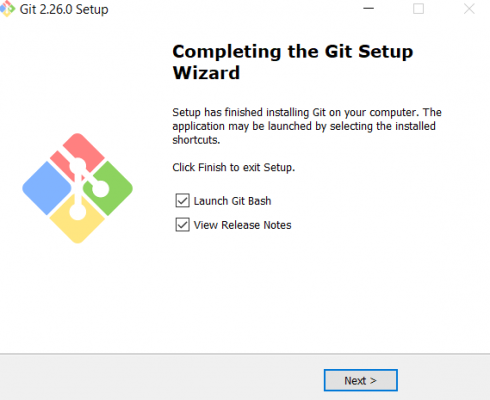
1 - Downloads Necessários: - Visual Studio 2019 Community: https://visualstudio.microsoft.com/pt-br/thank-you-downloading-visual-studio/?sku=Community&rel=16 - Microsoft Visual C++ 2015-2019 Redistributable: (32-bit download, 64-bit download) - Git: https://git-scm.com/download/win 2 - Visual Studio 2019: - Na tela inicial do Visual Studio, no produto Visual Studio Community 2019 clique no botão Instalar. - Na próxima tela, selecione Desenvolvimento para Desktop com C++. - Na mesma tela em Detalhes da Instalação, selecione: - Depois em Pacotes de Idiomas, selecione: 3 - Instale os softwares necessários: - Instale o Git: 4 - VCPKG: - Utilize o Prompt de Comando ou Windows Powershell no diretório C: Prompt de Comando: cd C:\ Windows Powershell: cd C:\ - Para fazer a instalação completa do VCPKG, execute os comandos abaixo no Prompt de Comando ou Windows Powershell: 5 - Sources OTServBR-Global: - Faça o download das sources do OTServBR-Global com o comando abaixo no Prompt de Comando ou Windows Powershell. 6 - Instalação das bibliotecas VCPKG: - Escolha um dos conjuntos de bibliotecas abaixo de acordo com o seu sistema operacional. - Execute o comando com o Prompt de Comando ou Windows Powershell. - Para compilação em 64-bit: .\vcpkg install --triplet x64-windows boost-asio boost-filesystem boost-iostreams boost-lockfree boost-system boost-variant cryptopp libmariadb luajit mpir pugixml - Para compilação em 32-bit: .\vcpkg install boost-asio boost-filesystem boost-iostreams boost-lockfree boost-system boost-variant cryptopp libmariadb luajit mpir pugixml - Após a escolha e a instalação de um dos conjuntos de bibliotecas, utilize o comando abaixo para integrar a instalação ao Visual Studio: .\vcpkg integrate install 7 - Compilando as Sources do OTServBR-Global: - Encontre o diretório vc14 do OTServBR-Global (C:\vcpkg\otservbr-global\vc14) e abra o arquivo otservbr-global.vcxproj. Isso irá abrir o Visual Studio e você estará apto a compilar as sources. - No Visual Studio, escolha a opção Release e a solução "Win32" ou "x64". - Para compilar as sources, clica em Build no menu e depois em Build Solution. - As sources serão compiladas com sucesso. 7.1 - Observação: - Se o seu processador é antigo para melhor otimização, compile o servidor com a instrução abaixo: - No Visual Studio, edite as propriedades do projeto e troque 'Enhanced Instruction Set' para 'SSE2'. 8 - DLL's Necessárias: Para compilação em 64-bit: - Copie as DLLs da pasta (C:\vcpkg\otservbr-global\vc14\x64\Release). - Copie o executável da pasta (C:\vcpkg\otservbr-global\vc14\x64\Release). - E cole na pasta raiz do servidor. Obs: a pasta do servidor pode ser salva em outro diretório de sua preferência e que tenha permissão para os arquivos. Para compilação em 32-bit: - Copie as DLLs da pasta (C:\vcpkg\otservbr-global\vc14\Release). - Copie o executável da pasta (C:\vcpkg\otservbr-global\vc14\Release). - E cole na pasta raiz do servidor. Obs: a pasta do servidor pode ser salva em outro diretório de sua preferência e que tenha permissão para os arquivos. 9 - Abrindo o Servidor: - Para abrir o servidor OTServBR-Global, siga 1 (uma) das opções abaixo: [MySQL] OTServBR-Global + XAMPP + MyAAC: [MySQL] OTServBR-Global + Uniform Server + MyAAC: [MySQL] OTServBR-Global + Uniform Server + GesiorAAC2012: [MySQL] OTServBR-Global + Uniform Server + ZnoteAAC: 10 - Créditos: Desenvolvedores TFS: https://github.com/otland/forgottenserver/wiki/Compiling-on-Windows-(vcpkg) Majesty (Tutorial de compilação do OTServBR-Global no VS2019) Microsoft - VCPKG: https://github.com/Microsoft/vcpkg


-
Fala galera do TK, criei esse anelzinho pra servers que procuram inovar.. bom, oque ele faz?? Simples, ele torna o usuário invisível. aff, mas já existe o stealth ring que faz isso! Sim mas dessa vez eu digo invisível mesmo, nenhum monstro ou players conseguirá te ver. que lixo, assim qualquer player vai poder ficar invisível e passar no meio dos monstros e players.. vai estragar o server Aí é que vc se engana porque o anel vem uma maldição, quem usar ele vai perdendo 3% de vida por segundo (ajustável) e só vai estragar o server se vc sair distribuindo o anel pra todos os players haha O anel em si possui duas versões, na primeira ele retira 3% de vida por segundo, na segunda ele adiciona uma condição que te deixa perdendo uma quantidade fixa de vida, CONTUDO, na segunda versão aparece uma poça de sangue cada vez que toma o dano então dá pros players te pegarem caso vc coloque o anel e resolva fugir kkkkk Vou chamar aqui de versão 1 e 2 respectivamente. OBS: ISSO É EM MOVEMENTS! 1ª versão (sem sangue mas que tira 3% de vida por segundo): local invisible = createConditionObject(CONDITION_GAMEMASTER, -1, false, GAMEMASTER_INVISIBLE) local outfit = createConditionObject(CONDITION_INVISIBLE, -1, false) local percent = 3 local tempo = 1 -- em segundos function onEquip(cid, item, slot) doPlayerSendTextMessage(cid, MESSAGE_STATUS_CONSOLE_BLUE, "By using this ring you will become fully invisible and lose health over time because of it's curse.") function lifesteal(cid) steal = addEvent(lifesteal, 1000*tempo, cid) if isCreature(cid) then doSendAnimatedText(getCreaturePos(cid), "-"..math.floor((getCreatureMaxHealth(cid) * (percent/100))), 144, cid) doCreatureAddHealth(cid, -math.floor(getCreatureMaxHealth(cid) * (percent/100))) end end lifesteal(cid) doAddCondition(cid, invisible) doAddCondition(cid, outfit) doSendMagicEffect(getCreaturePos(cid), 12) return true end function onDeEquip(cid, item, slot) doTransformItem(item.uid, 2165) doPlayerSendTextMessage(cid, MESSAGE_STATUS_CONSOLE_BLUE, "You're no longer receiving the special bonus..") stopEvent(steal) doRemoveCondition(cid, CONDITION_INVISIBLE) doSendMagicEffect(getCreaturePos(cid), 12) doRemoveCondition(cid, CONDITION_GAMEMASTER, GAMEMASTER_INVISIBLE) return true end 2ª versão (a cada 1,5 segundos ele te tira um dano configurado e deixa uma poça de sangue embaixo de vc facilitando que te identifiquem mesmo estando invisivel): local invisible = createConditionObject(CONDITION_GAMEMASTER, -1, false, GAMEMASTER_INVISIBLE) local outfit = createConditionObject(CONDITION_INVISIBLE, -1, false) local condition = createConditionObject(CONDITION_PHYSICAL) setConditionParam(condition, CONDITION_PARAM_DELAYED, TRUE) addDamageCondition(condition, -1, 1500, -500) function onEquip(cid, item, slot) doPlayerSendTextMessage(cid, MESSAGE_STATUS_CONSOLE_BLUE, "By using this ring you will become fully invisible and lose health over time because of it's curse.") doAddCondition(cid, condition) doAddCondition(cid, invisible) doAddCondition(cid, outfit) doSendMagicEffect(getCreaturePos(cid), 12) return true end function onDeEquip(cid, item, slot) doTransformItem(item.uid, 2165) doPlayerSendTextMessage(cid, MESSAGE_STATUS_CONSOLE_BLUE, "You're no longer receiving the special bonus..") doRemoveCondition(cid, CONDITION_PHYSICAL) doRemoveCondition(cid, CONDITION_INVISIBLE) doSendMagicEffect(getCreaturePos(cid), 12) doRemoveCondition(cid, CONDITION_GAMEMASTER, GAMEMASTER_INVISIBLE) return true end Agora edite no items.xml o stealth ring pra que ele seja infinito: <item id="2202" article="a" name="stealth ring"> <attribute key="weight" value="100" /> <attribute key="slotType" value="ring" /> <attribute key="transformDeEquipTo" value="2165" /> </item> e em movements.xml adicione essas linhas: <movevent type="Equip" itemid="2202" slot="ring" event="script" value="stealth.lua"/> <movevent type="DeEquip" itemid="2202" slot="ring" event="script" value="stealth.lua"/> Editando: Na primeira versão vc pode alterar as seguintes coisas que estão em colorido: local invisible = createConditionObject(CONDITION_GAMEMASTER, -1, false, GAMEMASTER_INVISIBLE) local outfit = createConditionObject(CONDITION_INVISIBLE, -1, false) local percent = 3 local tempo = 1 -- em segundos em vermelho é o tempo que dura a invisibilidade... -1 é infinito em azul é a porcentagem de vida que perde por tempo em verde é o tempo em que se perde vida.. nesse caso a cada 1 segundo perde 3% Na segunda versão vc pode editar as mesmas coisas do primeiro só que o tempo e o dano pelo tempo estão na condition: local condition = createConditionObject(CONDITION_PHYSICAL) setConditionParam(condition, CONDITION_PARAM_DELAYED, TRUE) addDamageCondition(condition, -1, 1500, -500) em vermelho é o numero de vezes que vai tirar vida. Mais uma vez -1 significa infinito (infinito até remover o anel) em azul é o dano que vc toma a cada tempo (lembre-se de deixar sempre um - na frente se não ele vai adicionar vida) em verde é o tempo em que se perde vida.. nesse caso a cada 1 segundo e meio retira 500 de vida Bom, é isso.. um script simples mas que vai ajudar muita gente pelo fato de usar conditions não tão comuns e de uma forma diferente haha
-
O OpenCoreMMO é um emulador de servidor MMORPG gratuito e de código aberto escrito em C#. Baseia-se no forgotten server (OpenTibia). Para se conectar ao servidor, você pode usar OTClient ou OpenTibiaUnity para a versão 8.6. Lista de funcionalidades! Leitura da estrutura de arquivos OTB e OTBM Carregando OTBM Tile Area, Towns e Waypoints Carregando Áreas de Spawn LogIn e LogOut Player no jogo Todos os movimentos do jogador Conexão multijogador Spawn e Respawn Monsters Combate PvM Depot Bate-papos -Guilds -Canais Públicos -Canais de pilhagem e morte Lista VIP Combate PvP Sistema NPC Lua Scripting C# Scripting Tecnologias: C# .Net 5 Database support: InMemory, MySQL, SQL Server and SQLite Console Debug Logging XUnit Testing Amostra: [spoiler] [/spoiler] Como rodar? Suporte para mysql e sqlite, para rodar em seu PC veja este guia rápido: https://caioavidal.gitbook.io/opencoremmo/how-to-run Acompanhe o projeto em: Github: https://caioavidal.gitbook.io/opencoremmo/ https://github.com/caioavidal/OpenCoreMMO Trello: https://trello.com/b/JnOJ9yn5/opencoremmo TibiaKing:


-
-
-
Vi um pessoal atrás desse sistema e decidi trazer pra cá ;] O que é: Um sistema em que você insere um Cartão de Crédito em um Caixa Eletrônico para executar ações iguais às de um banco de verdade. Crie um arquivo em mods com extensão .xml e coloque isso dentro se quiser editar o id do item que é usado como cartão de crédito altere aqui: Por recomendações do criador do script, é sugerido que se coloque NO-LOGOUT na área da fila. Veja as imagens abaixo: Observações: - Para usar o caixa eletrônico, você tem que dar Use With nele com o cartão. Créditos: LuckOake -- Pelo sistema
-
 Versão testada : 8.6 a TAG tem 2 tipos uma com % da mana e outra com valor fixo, vou disponibilizar as 2 tags vc escolhe o que preferir. <!-- Custom AVP Spells --> <instant name="SumonScript " words="Msg que vai sumonar você escolhe" lvl="lvl minimo para usar" maglv="ml para usar" manapercent="quanto gasta de mana em porcentagem 1,20,50,100" exhaustion="2000" needlearn="0" event="script" value="summon/summon_script.lua"> <vocation id="1"/>-- vocations do server que pode usar a magia , mecha de acordo com sua vontade <vocation id="2"/> <vocation id="3"/> <vocation id="4"/> </instant> ou essa TAG <!-- Custom AVP Spells --> <instant name="SummonScript" words="msg" lvl="40" maglv="ml para usar" mana="100" exhaustion="2000" needlearn="0" event="script" value="summon/Gnomo.lua"> <vocation id="1"/> <vocation id="2"/> <vocation id="3"/> <vocation id="4"/> </instant> segue abaixo o lua. criei arquivo chamado summon_script.lua dentro da pasta data/spells/summon Versão 1.2 do script (update) -- seguindo problema indicado pelo @KotZletY atualizei o script.. Agora o summon prefiro deixa a escolha de vocês so por o nome do monstro do seu servidor lem cima na tabela t.summon eu puis o nome do demon uma creatura do tibia.
 -
 Olá pessoal, tudo bom? Então, estou trazendo um evento que criei: o Duca Evento. A uns 10 anos atrás joguei um ot pvp enforced que funcionava quase da mesma forma desse evento e recentemente resolvi criar um evento dessa forma ... Como funciona: • Primeiramente abre um teleport onde os jogadores que estão acima do level estipulado podem entrar (lembrando que o teleport fica aberto até o final do evento, ou seja, você pode morrer dentro do evento e entrar novamente quantas vezes quiser). • Ao entrar no teleport você será enviado para uma equipe: azul ou rosa (lembrando que o objetivo é você matar jogadores da outra equipe e não poderá atacar os da mesma equipe). • Existe uma pontuação dentro do evento, ou seja, a cada jogador que matar da outra equipe você ganha 1 duca ponto (lembrando que se você morrer você é teleportado para fora do evento e seus duca pontos zeram.) • A cada morte dentro do evento é atualizada uma LISTA RANK, onde é gerado um rank de acordo com a pontuação dentro do evento. • O evento começa ficar bom quando existem mais de 11 jogadores dentro dele, pois é quando o sistema verifica os jogadores da "lista rank" que estão nas posições de segundo a décimo primeiro (2º a 11º) e coloca eles em uma equipe diferente: a vermelha, e é ai que o "bicho pega", pois fora os outros jogadores das outras equipes, existem 10 jogadores dessa equipe, e o melhor, quem mata-los recebe 10 duca pontos. • Como dito acima, ao ter mais de 11 jogadores dentro do evento é criado automaticamente a equipe vermelha (2º a 11º do rank), pois bem, para quem leu certinho viu que pulamos o 1º do rank: é ai que entra a equipe verde, sim, esta equipe será composta apenas por 1 jogador, sempre o que tiver mais pontos no evento (lembrando que essa função do sistema atualiza a cada morte dentro do evento), e é claro quem mata-lo ganhará 30 pontos dentro do evento. • Aconselho a colocar sempre o tempo do evento superior a 30 minutos para melhor jogabilidade e rivalidade. • O objetivo do evento é ser do time verde ao terminar o evento e ganhar o premio (configurei para os do time vermelho tbem ganhar premio, mas inferior ao do verde). Observações: • As cores das equipes que citei são represetativas, lá você pode editar as que quiserem. • Um mapa opcional esta disponivel para download no tópico. • Não ensinarei detalhes minimos de instalação no servidor porque você deve ao menos ter uma noção básica de otserv. Como instalar: • Primeiramente o arquivo que ficará na lib, ele é o coração do evento, tudo que você precisar configurar é nele. Nomeie de DUCA.lua: • Depois na pasta creaturescripts/scripts/ crie o arquivo DUCA_creaturescripts.lua: (lembrando que as tags para colocar no creaturescripts.xml esta como comentário no começo do código) • Depois na pasta globalevents/scripts/ crie o arquivo DUCA_globalevents.lua: (lembrando que as tags para colocar no globalevents.xml esta como comentário no começo do código) • Depois na pasta movements/scripts/ crie o arquivo DUCA_movements.lua: (lembrando que as tags para colocar no movements.xml esta como comentário no começo do código) Espero que gostem! D U C A ducaMap.otbm
 -
 creaturescripts.xml <event type="login" name="aloot_reg" event="script" value="aloot.lua"/> <event type="kill" name="aloot_kill" event="script" value="aloot.lua"/> creaturescripts/scritps aloot.lua function onLogin(cid) registerCreatureEvent(cid, "aloot_kill") return true end local stor = 7575 function autoloot(cid, target, pos) local function doStack(cid, itemid, new) local count = getPlayerItemCount(cid, itemid) if (count > 100) then count = count - math.floor(count / 100) * 100 end local newCount = count + new if (count ~= 0) then local find = getPlayerItemById(cid, true, itemid, count).uid if (find > 0) then doRemoveItem(find) else newCount = new end end local item = doCreateItemEx(itemid, newCount) doPlayerAddItemEx(cid, item, true) end local function scanContainer(cid, uid, list) for k = (getContainerSize(uid) - 1), 0, -1 do local tmp = getContainerItem(uid, k) if (isInArray(list, tmp.itemid)) then if isItemStackable(tmp.itemid) and (getPlayerItemCount(cid, tmp.itemid) > 0) then doStack(cid, tmp.itemid, tmp.type) else local item = doCreateItemEx(tmp.itemid, tmp.type) doPlayerAddItemEx(cid, item, true) end doPlayerSendTextMessage(cid, MESSAGE_STATUS_CONSOLE_BLUE, 'Looted ' .. tmp.type .. ' ' .. getItemNameById(tmp.itemid) .. '.') doRemoveItem(tmp.uid) elseif isContainer(tmp.uid) then scanContainer(cid, tmp.uid, list) end end end local items = {} for i = getTileInfo(pos).items, 1, -1 do pos.stackpos = i table.insert(items, getThingFromPos(pos)) end if (#items == 0) then return end local corpse = -1 for _, item in ipairs(items) do local name = getItemName(item.uid):lower() if name:find(target:lower()) then corpse = item.uid break end end if (corpse ~= -1) and isContainer(corpse) then scanContainer(cid, corpse, tostring(getPlayerStorageValue(cid, stor)):gsub('_', ''):explode(',')) end end function onKill(cid, target, lastHit) if not isPlayer(target) then local infos = getPlayerStorageValue(cid, stor) if (infos == -1) then return true end local list = tostring(infos):explode(',') if (#list == 0) then return true end addEvent(autoloot, 150, cid, getCreatureName(target), getCreaturePosition(target)) end return true end talkactios.xml <talkaction words="/aloot" hide="yes" event="script" value="aloot.lua"/> Talkaction/scrips local stor, limit = 7575, 5 --storage, limit to add. local allow_container = false --empty! not looted with items, atleast for now. function onSay(cid, words, param) local expl = param:explode(':') local action, rst = expl[1], expl[2] if (action:lower() == 'check') then local infos, list = getPlayerStorageValue(cid, stor), {} if (infos ~= -1) then list = tostring(infos):explode(',') end local txt = 'Autoloot List:\n' if (#list > 0) then for k, id in ipairs(list) do id = id:gsub('_', '') if tonumber(id) then txt = txt .. getItemNameById(tonumber(id)) .. ((k < #list) and '\n' or '') end end else txt = 'Empty' end doPlayerPopupFYI(cid, txt) elseif (action:lower() == 'add') then local infos, list = getPlayerStorageValue(cid, stor), {} if (infos ~= -1) then list = tostring(infos):gsub('_', ''):explode(',') end if (#list >= limit) then return doPlayerSendCancel(cid, 'You already have ' .. limit .. ' autolooting items.') end local item = tonumber(rst) if not item then item = getItemIdByName(rst, false) if not item then return doPlayerSendCancel(cid, 'not valid item.') end end if not allow_container and isItemContainer(item) then return doPlayerSendCancel(cid, 'this item can not be autolooted.') end local attrs = getItemInfo(item) if not attrs then return doPlayerSendCancel(cid, 'not valid item.') elseif not attrs.movable or not attrs.pickupable then return doPlayerSendCancel(cid, 'this item can not be autolooted.') end if isInArray(list, item) then return doPlayerSendCancel(cid, 'already added.') end table.insert(list, tostring(item)) local new = '' for v, id in ipairs(list) do new = new .. '_' .. id:gsub('_' ,'') .. ((v < #list) and ',' or '') end doPlayerSetStorageValue(cid, stor, tostring(new)) doPlayerSendTextMessage(cid, MESSAGE_STATUS_CONSOLE_BLUE, 'Item >>' .. getItemNameById(item) .. '<< has been added to the autoloot list.') elseif (action:lower() == 'remove') then local infos, list = getPlayerStorageValue(cid, stor), {} if (infos ~= -1) then list = tostring(infos):gsub('_', ''):explode(',') end if (#list == 0) then return doPlayerSendCancel(cid, 'You dont have any item added.') end if (#list >= limit) then return doPlayerSendCancel(cid, 'You already have ' .. limit .. ' autolooting items.') end local item = tonumber(rst) if not item then item = getItemIdByName(rst, false) if not item then return doPlayerSendCancel(cid, 'not valid item.') end end if not isInArray(list, item) then return doPlayerSendCancel(cid, 'This item is not in the list.') end local new = '' for v, id in ipairs(list) do if (tonumber(id) ~= item) then new = new .. '_' .. id:gsub('_' ,'') .. ((v < #list) and ',' or '') end end doPlayerSetStorageValue(cid, stor, tostring(new)) doPlayerSendTextMessage(cid, MESSAGE_STATUS_CONSOLE_BLUE, 'Item >>' .. getItemNameById(item) .. '<< removed from the autoloot list.') end return true end Usando /aloot check Cheka a Lista dos Loots /aloot add:itemid ou nome do item Exemplo /aloot add:worm /aloot add:2170 16:42 Item >>worm<< has been added to the autoloot list. Para remover /aloot remove:worm /aloot remove:2170 Exemplo Testado: 16:41 Looted 2 gold coin. 16:41 Looted 1 cheese. CREDITOS: eduardobean é isso pessoal gosto da + Rep
 -
 Introdução: É uma wand que ataca vários elementos aleatoriamente, porém não somente isso, você pode alterar o elemento dela com uma talkaction. Instalação: Vá até data/weapons/scripts e crie um arquivo chamando wandelementos.lua e coloque o seguinte conteúdo: local min, max = 1700,1900 --Ataque mínino e ataque máximo local w = { [1] = {ef = 36, sh = 3, dmg = COMBAT_FIREDAMAGE}, [2] = {ef = 42, sh = 28, dmg = COMBAT_ICEDAMAGE}, [3] = {ef = 46, sh = 38, dmg = COMBAT_POISONDAMAGE}, [4] = {ef = 17, sh = 31, dmg = COMBAT_DEATHDAMAGE}, [5] = {ef = 47, sh = 35, dmg = COMBAT_ENERGYDAMAGE}, [6] = {ef = 36, sh = 31, dmg = COMBAT_PHYSICALDAMAGE}, [7] = {ef = 49, sh = 37, dmg = COMBAT_HOLYDAMAGE} } function onUseWeapon(cid, var) local effect = getPlayerStorageValue(cid, 4561) local target = getCreatureTarget(cid) if target ~= 0 then local wx = w[effect] or w[math.random(#w)] doSendDistanceShoot(getThingPos(cid), getThingPos(target), wx.sh) addEvent(doAreaCombatHealth, 100, cid, wx.dmg, getThingPos(target), 0, -min, -max, wx.ef) end return true end Altere o min e max de acordo com sua necessidade. Agora vá em data/weapons/weapons.xml e coloque o seguinte conteúdo: <wand id="7424" level="100" mana="30" event="script" value="wandelementos.lua"> <vocation id="1"/> <vocation id="2"/> <vocation id="5" showInDescription="0"/> <vocation id="6" showInDescription="0"/> </wand> Altere o id, level e mana de acordo com sua necessidade. Agora vamos configurar a talkaction que troca os elementos. Vá até data/talkactions/scripts e crie um arquivo chamando elementos.lua e coloque o seguinte conteúdo: local config = { wand_id = 7424, --ID da wand types = { ["all"] = -1, --Ataca os elementos aleatoriamente ["fire"] = 1, ["ice"] = 2, ["poison"] = 3, ["death"] = 4, ["energy"] = 5, ["physical"] = 6, ["holy"] = 7 } } function onSay(cid, words, param) local wand_left = getPlayerSlotItem(cid, CONST_SLOT_LEFT).itemid local wand_right = getPlayerSlotItem(cid, CONST_SLOT_RIGHT).itemid if wand_left ~= config.wand_id and wand_right ~= config.wand_id then doPlayerSendCancel(cid, "Voce deve estar equipado com uma ".. getItemNameById(config.wand_id) .." para usar este comando.") return true end if config.types[param] then setPlayerStorageValue(cid, 4561, config.types[param]) doPlayerSendTextMessage(cid, MESSAGE_EVENT_ORANGE, "Sua wand ira atacar ".. param .. ".") else local str = "" for i, _ in pairs(config.types) do str = str .. ", ".. i end doPlayerSendTextMessage(cid, MESSAGE_EVENT_ORANGE, "Os elementos disponiveis sao: ".. string.sub(str, 3, #str) ..".") end return true end Altere o wand_id conforme configurado em weapons. Agora vá em data/talkactions/talkactions.xml e coloque o seguinte conteúdo: <talkaction words="!elemento;/elemento" event="script" value="elementos.lua"/> Exemplo de funcionamento: https://www.youtube.com/watch?v=HHmZ1RpsrD0 Gostaria de deixar um agradecimento especial para MaXwEllDeN, pela ajuda.
 -
 Mana e Life 100/100 Salve galerinha, estive procurando em vários tópicos, algum codigo de life e mana 100/100, e nenhum deles funcionava perfeito para oque eu precisava, todos eles paravam de funcionar quando o player atingia o level 715835 ou mana/life "21474847" o numero 100 da vida virava 65750 ou da mana, de qual você atingisse primeiro "21474847" e pra quem quer por high XP isso é um problema, mas depois de muito, MUITO,MUITO,muito esforço de um amigo, @Rusherzin, ele conseguiu burla isso, e agora você pode pegar quantos de level/mana/life quiser que não vai sair de 100/100, então é isso vamos ao que interessa. TFS 0.4 foi testado ! Nas SOURCES arquivo protocolgame.cpp procure por: void ProtocolGame::AddPlayerStats(NetworkMessage_ptr msg) e substitua por isso: Imagem mostrando certinho a life/mana Créditos: 99% @Rusherzin Por fazer tudo ! 1% @Zzyzx Por ficar incomodando até ele fazer !


-
 Boa noite galera, após um pedido aqui no fórum sobre um sistema de Cassino, decidi então criar este e disponibilizar para vocês. Introdução: Bom, este script simula a máquina de Cassino conhecida como Cassino Slots, pra quem não conhece é a máquina que se encontra no spoiler abaixo: Como funciona? O jogador precisa escolher 1 (um) dos 10 (dez) itens disponíveis (da para configurar a quantidade de itens) como seu Item da Sorte, e após feito isso, terá que girar a alavanca e torcer para que a máquina sorteie 3 itens repetidos igual ao que o jogador em questão escolheu. Para tornar um pouco mais fácil de vencer, criei para que a máquina dê pequenos brindes à quem acertar 1 ou 2 itens dos sorteados (configurável). Como jogar? Para jogar é simples, como desenvolvi todo script em apenas um arquivo, para facilitar na criação, na instalação e até mesmo na jogabilidade, o jogo se baseia na posição em que o jogador está para identificar qual ação executar. Selecionar Item da Sorte: com seu personagem virado para baixo (sul), clique na alavanca e automaticamente o item da sorte aparecerá na mesa configurada no script, caso queira outro item, basta ir usando a alavanca até encontrar o item desejado. Como Jogar: Após ter selecionado seu item da sorte, que deve estar à mostra em cima da mesa própria, basta virar seu personagem para cima (norte) e clicar novamente na alavanca. E se virar esquerda ou direita?: Nada acontecerá, apenas uma mensagem ensinando como jogar será enviada para que o jogador se oriente. Dicas de instalação! Sugiro que quando for criar o mapa para o evento, não faça como do vídeo, pois os itens criados nas mesas não estão com atributos para que não possam ser movidos, sendo assim é provável que jogadores de má fé venham a roubar itens... Faça como a imagem abaixo: Instalando: Basta criar um arquivo na pasta “data/actions/scripts” chamado “cassino_slots.lua” e adicionar o código abaixo dentro: Agora em “actions.xml” adicione a tag abaixo: Agora basta configurar de acordo com as informações disponíveis no início do script. Vejam o vídeo demonstrativo do Sistema em funcionamento. Criado por: Adriano Swatt'
 -
 Meu primeiro tutorial....vamos la! vamos criar vip 4 como exemplo Primeiro precisamos achar um action não usado! Em Data/actions/actions.xml digite CTRL+F e procure um action não usado no meu caso vai ser 15670 e 15671! um deles vamos usar no piso e outro no baú de recompensa! Começando! Data/actions/scripts Crie um arquivo .lua / pode copiar uma e colar substituindo o nome e limpando dentro! o meu irá se chamar premiumtile.lua 15671 - ACTION QUE USAREMOS NO BAÚ... 15670 - ACTION QUE USAREMOS NO PISO... "Você jah pegou sua recompensa.") MENSAGEM QUANDO TENTAR MAIS QUE UMA VEZ... "Voce agora é um Vip4. System Vip By ~{GOD}Josias~.") -MENSAGEM QUANDO GANHAR A RECOMPENSA... (cid,2157,5) - iD DO ITEM DE RECOMPENSA (5) QUANTIDADE -- O MEU É GOLD NUGGET (cid,6567,1) - iD ITEM E QUANTIDADE (1) CUSTOMIZADO QUE GANHARÁ EX: (santa doll) (cid,15670,1) - ACTION DO PISO NOVAMENTE... EM DATA/ACTIONS/ACTIONS.XML Cole isto "15671" - ACTION QUE UTILIZAMOS PARA O BAÚ "premiumtile.lua" - NOME do arquivo feito anteriormente Agora vamos em DATA/MOVEMTS/SCRIPTS Crie um arquivo.lua (o meu será - premium tile.lua-) COLE ISTO -MODIFIQUE SE DESEJAR {x=160, y=54, z=7} -POSIÇÃO QUE O PLAYER SERÁ LANÇADO AO TENTAR PASSAR SEM SER VIP 4 15670 - ACTIONS USADAS COMO PISO ATÉ AGORA... doPlayerSendCancel(cid,"mensagem caso tente entrar sem ser vip4") Agora em DATA/MOVEMENTS/MOVEMENTS.XML Cole isto: 15670 - ACTIONS USADAS NO PISO... premium tile.lua - NOME DO ARQUIVO CRIADO ANTERIORMENTE... BEM NO SEU MAP EDITOR CRIE UM PISO COM ACTIONS 15670 ASSIM: EXEMPLO PISO (ItemID: [9565], ActionID: [15670], UniqueID: [15670]. BEM NO SEU MAP EDITOR CRIE UM BAÚ COM ACTION 15671 ASSIM : ItemID: [1746], ActionID: [15671], UniqueID: [15671]. BOM GALERA ESPERO TER AJUDADO ESSE FOI MEU PRIMEIRO TUTORIAL DESCULPA SE NÃO ORGANIZEI MUITO BEM! REP + SE GOSTOU E AQUI VAI UM EXTRA! criando montdoll como o da quest vip que transforma em monstro! DATA/ACTIONS/SCRIPTS Crie um arquivo.lua ( o meu é esse) mountvipee.lua e cole isto modificando do seu gosto AGORA EM DATA/ACTIONS/ACTIONS.XML Cole isto a baixo da linha <!-- Mount System --> 6567 -ID ITEM DOLL QUE VOCÊ QUER USAR PARA ISTO! xD mountvipee.lua - NOME DO ARQUIVO.LUA QUE VOCÊ ACABOU DE CRIAR... e está ai.. Testado e comprovado.. Me perdoem por falhas nas organizações.. só quero ajudar ja que não encontrei nenhum ensinando vlw! ? REP+ PRA AJUDAR! no insentivo
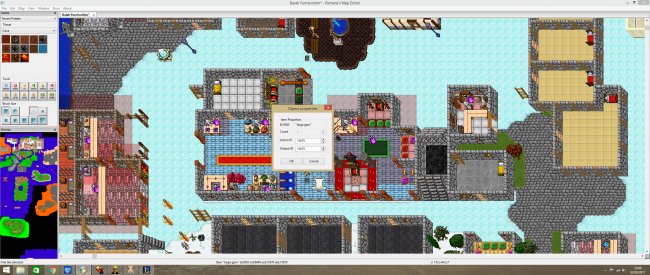

-
 [simples Sys montaria] Talkactions TFS 0.3.6/0.4 - 8.54-8.6 Script: Medio esse script ele troca a outfit do player por talkactions e add uma speed comfiguravel no player tudo bem simples e facil de entender. Vai em \data\talkactions>talkactions.xml e add essa tag <talkaction words="!mt" event="script" value="mount.lua"/> Vai em \data\talkactions\scripts>mount.lua e crie um aquivo la chamado "mount.lua" e add esse script dentro ----By Garep local config = { mount = {"mount", "montar"}, unmount = {"demount", "desmontar"}, storage = 6576 } local outfit = {lookType = 4} -- male local outfitf = {lookType = 4} -- female local condition = createConditionObject(CONDITION_HASTE) setConditionParam(condition, CONDITION_PARAM_TICKS, -1) setConditionFormula(condition, 0.25, 0, 0.50, 0) function onSay(cid, words, param) param = param:lower() if(table.isStrIn(param, config.mount) and getCreatureStorage(cid, config.storage) <= 0) then doCreatureSetStorage(cid, config.storage, 1) doAddCondition(cid, condition) doSendMagicEffect(getPlayerPosition(cid),12) if getPlayerSex(cid) == 0 then -- Se for homem doSetCreatureOutfit(cid, outfitf, -1) -- Roupa Feminina else doSetCreatureOutfit(cid, outfit, -1) -- Roupa Masculina end elseif(table.isStrIn(param, config.unmount)and getCreatureStorage(cid, config.storage) <= 1) then doRemoveCondition(cid, CONDITION_OUTFIT) doCreatureSetStorage(cid, config.storage, 0) doRemoveCondition(cid, CONDITION_HASTE) doSendMagicEffect(getPlayerPosition(cid),12) else doPlayerSendCancel(cid, "you need premium accunt.") return true end end Prints: CMD: "!mt montar ou mount" "!mt desmontar ou demount" dei uma editada no Script agora e por sexo tbm, as outfits Se gosto da um +REP